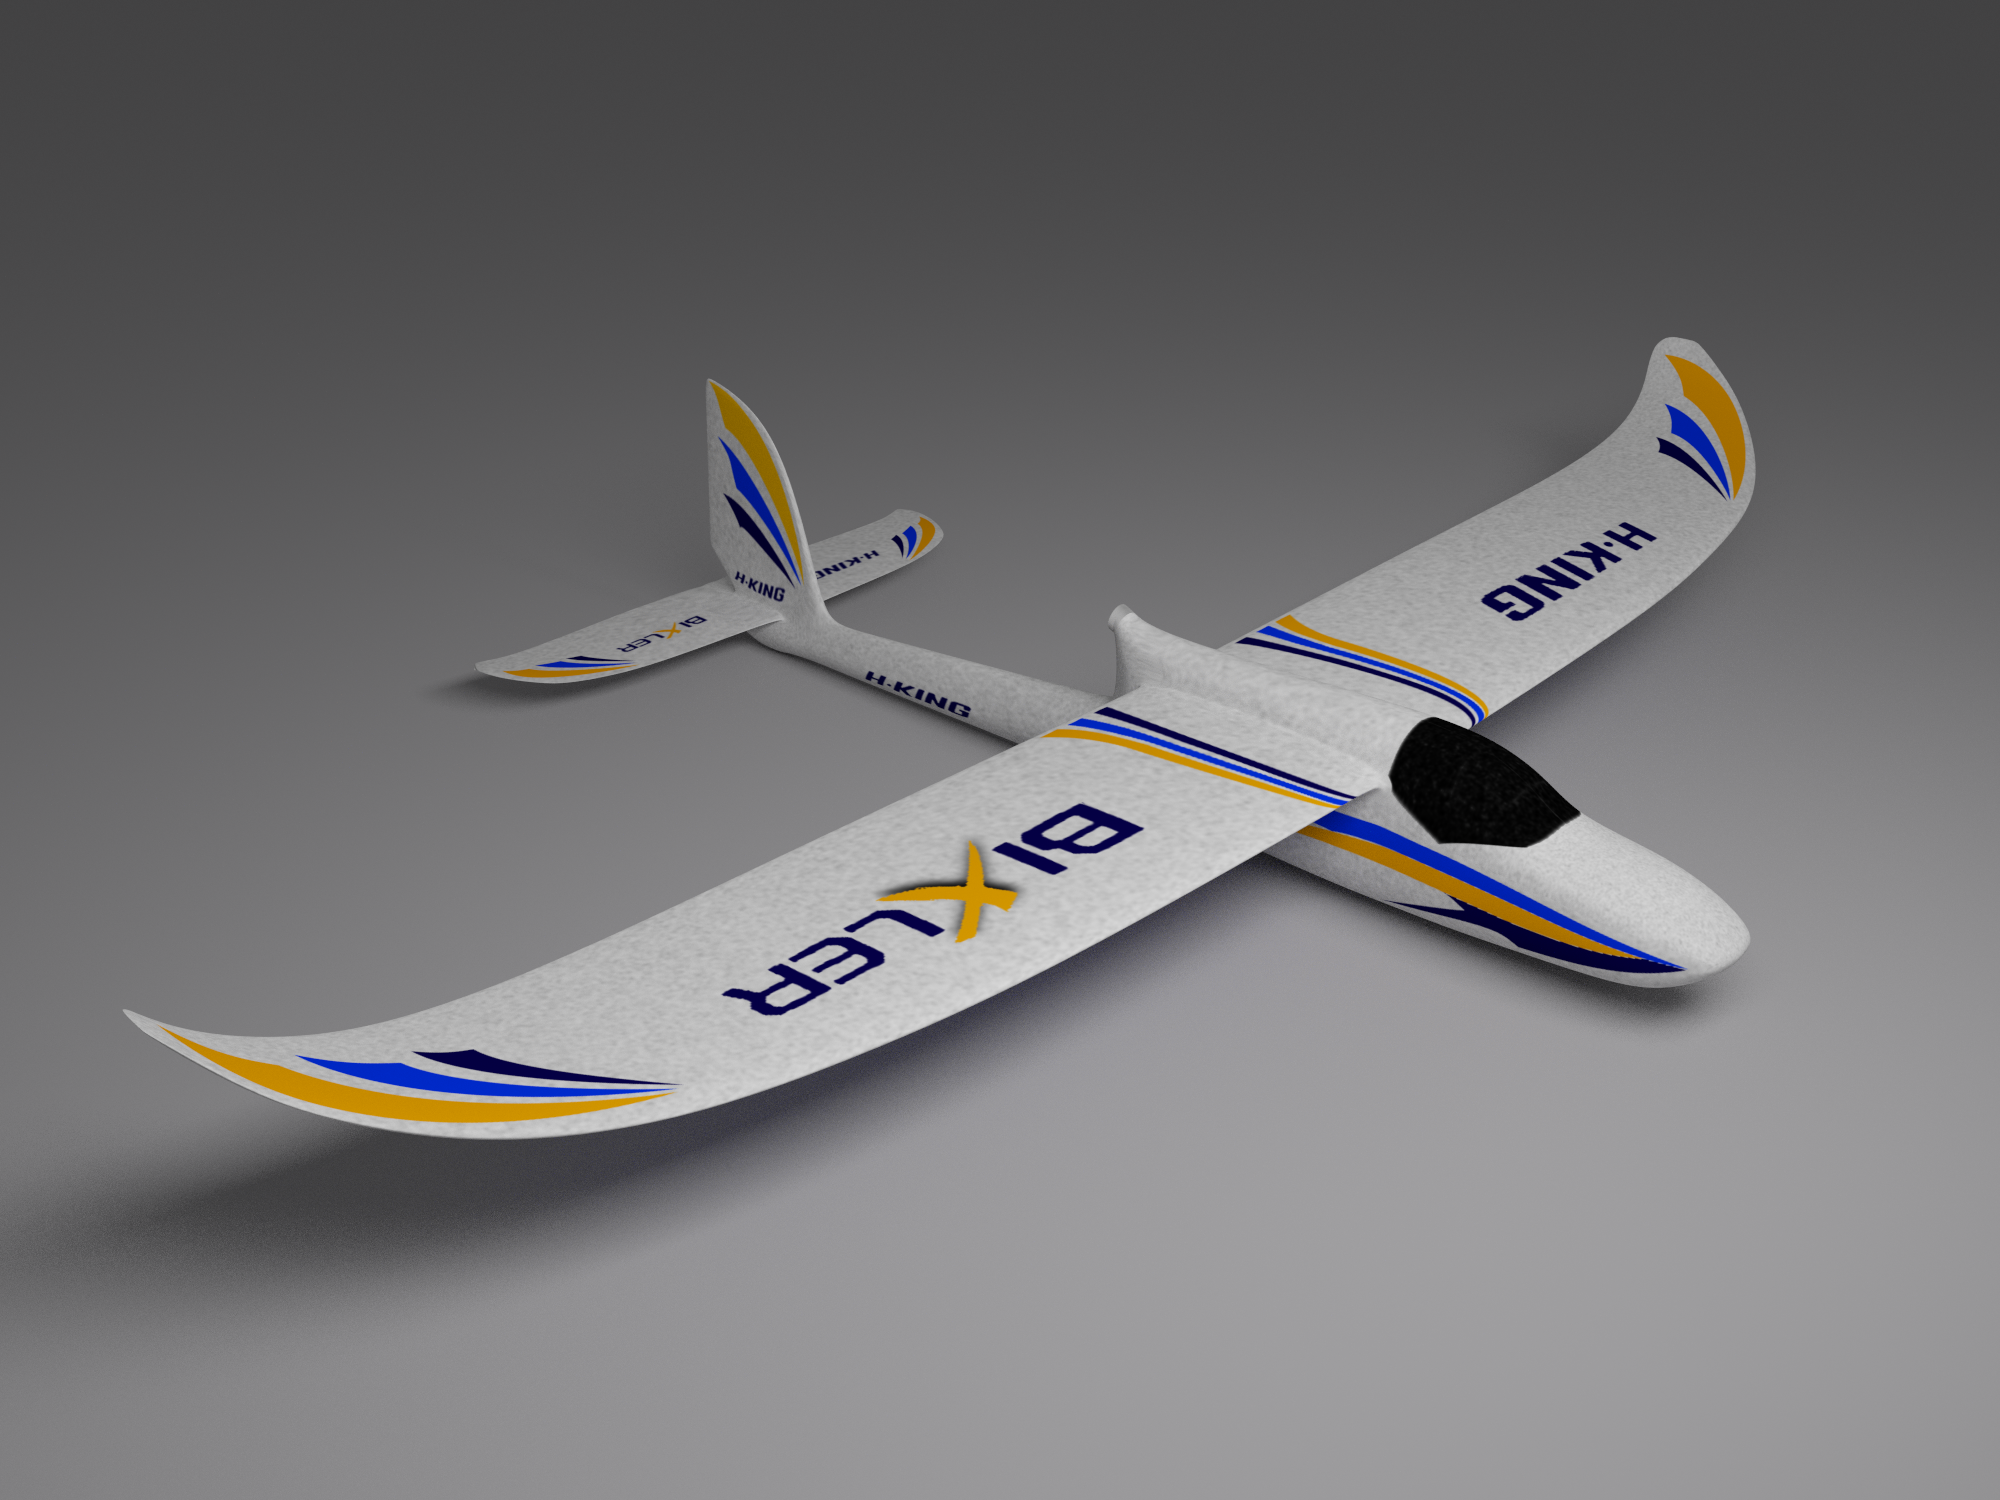
The final render of the Bixler model.
I decided to make an application showing the orientation of the plane. At this stage, I have only had the option of a stream of rotation data or a box 3d display. Neither of these really gives the picture of what the plane is doing, so I decided to get a model of the bixler. This turned out to be hard. There was not a single sky surfer or similar type airframe. Anywhere.
So initially I was looking around for easy to use modeling software, and surprisingly found some free Autodesk software, 123D Catch. It works by taking in a series of images, finding some common points, and then (guesses and) plots points for a 3d model based on the movement of those points relative to each other. More Info
This GIF shows all the images used to make a model using 123D catch.
After feeding the sequence into Catch, a wonky, disproportioned, holey and automatically textured low effort model was born. Some people have been able to make stunning 3D models with the software, but I was unable to achieve anywhere near the standard they had set. Maybe this could have served the purpose, but really, thats just not professional.

The model produced by 123D catch.
After discounting the use of 123D Catch as a tool to make a realistic and proportional model, I decided to look into some other options, which soon led to Blender. The free, open-source 3D modeling and animation program provided everything needed to create an electronic copy of the Bixler.
After a few helpful tutorials from BlenderGuru, I was ready to start the modeling process. The first take at modeling was really just to get a feel of what I would be doing, and an idea at what I wanted the end product to look like. This resulted in a strange looking curved wingtip plane thing. Great.
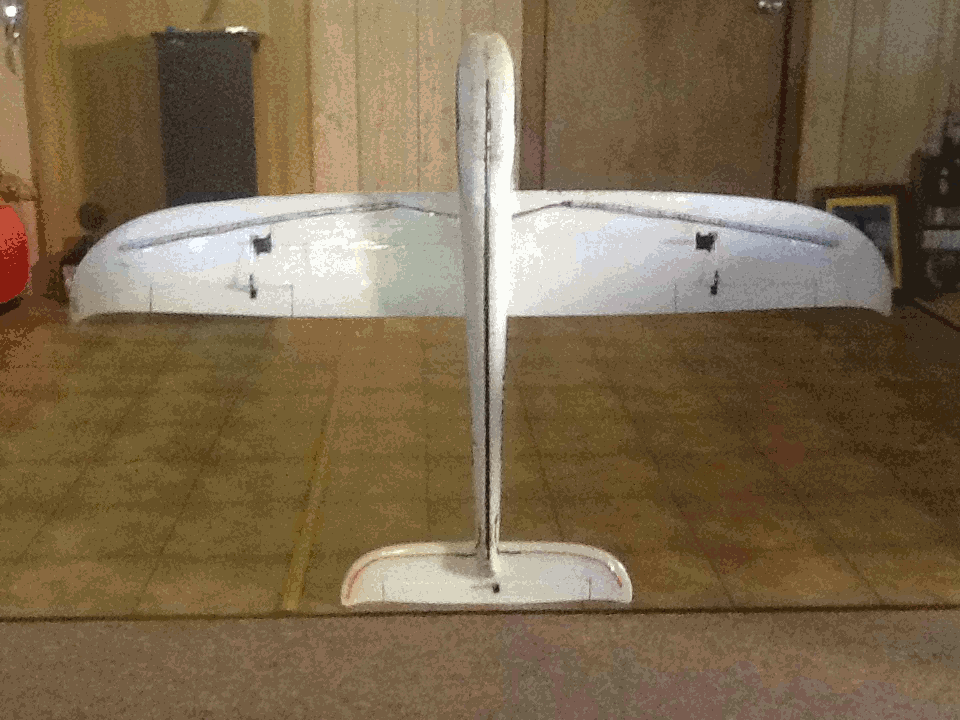
The second Go was for serious, using pictures of the plane as a structure to go off. Some techniques I had used didn’t really work that well on the real thing, which resulted in a lot of tiny gashes in the nose of the plane. This model looked quite convincing, though the perspective in the photographs made matching the model to the image nearly impossible.

The second attempt at modeling the bixler, this image is taken so the holes in the canopy can’t be seen
The third attempt began with the capture of a number of photos of the plane. These were then combined (using GIMP, another great free program) to reduce the effects of perspective. Sensing this as my last attempt, I captured a time lapse of the whole thing from here on:
So basically in the video I arrange all the template images, model the left view, top and front, finish up with some tweaks and do a subdivision (make it smooth). After the modeling that shape, I switch to a windows machine, unwrap the model in blender and use GIMP with the stitched images to make a copy of the stripes and text. After adding a quick foamy type texture, and a short animation to showcase the model (kind of got carried away, seen as it was originally for a 3D display) and a high quality static render, the Bixler model was complete.
Anyone wishing to download this FREE model can do so over on TF3DM: http://tf3dm.com/3d-model/hobbyking-bixler-sky-surfer-89447.html
Hopefully helped out some others that were like me, just looking for a good, free, Sky Surfer airframe 3D model.
Beginning work on the pc display, will try to post some periodic updates on progress.
Check out the facebook page: https://www.facebook.com/pages/Arduav/154892691342263
Have a look at the Youtube Channel: http://www.youtube.com/user/Arduav?feature=watch
